
App Guideline

1. Getting started
If you don’t have a user account yet, you can find out more about the registration in the following steps.

1.1 Sign up
Create an account using one of your preferred methods:
Via Google account
Tap the Continue with Google button, then select the Google account you want to register with. You’ll be able to setup your profile in the Profile setup menu, after login. (2.1)
Via email address
Tap the Register button, accept the Terms & Conditions, then complete the three step profile setup process. (1.2)
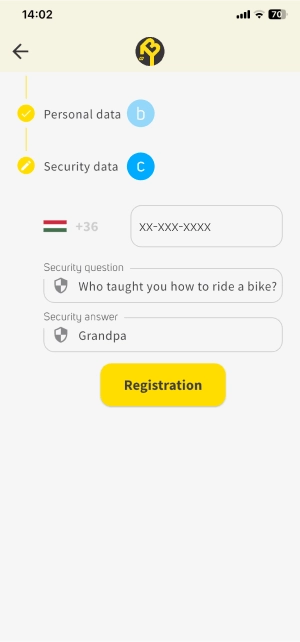
1.2 Profile setup
If you chose to register via email, complete the profile setup process by providing all the required information.
User data
Essential information to create your account.
Personal data
Information that helps us further tailor our products and services.
Security data
Information that helps us keep your account secure.


1.3 SMS verification
After setting up your profile, you will receive a confirmation code via SMS to verify.
Enter verification code
Enter the 4-digit verification code received in SMS.
2. Settings

2.1 Profile settings
Edit info
You can provide/edit your information by tapping on either the row or the Pen icon.
Save info
Save the newly entered info by tapping the Save icon. Note that you can edit and save only one information at a time.
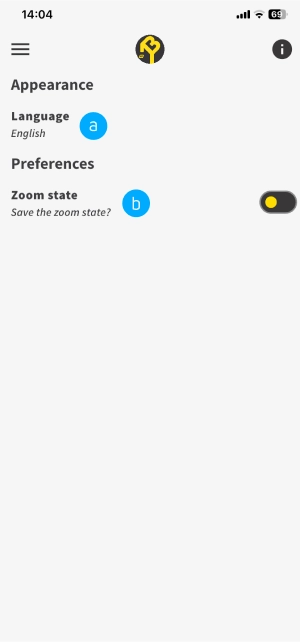
2.2 App settings
Language
Choose your preferred language by tapping the text.
Zoom state
Turn on this option if you want the map to remain on the last zoom state.
3. Station overview
When you select a station, there are several details displayed. In the following sections you can learn more about them and the actions that you can perform.

3.1 Station information
Station name and address
Each station has a unique name and exact address, to help you to identify it.
Station features
The icons indicate the dock’s unique features, such as Charging, PIN code or App compatibility.
Station status
The All docks indicates the total number of docks in the station, while Empty docks indicates the number of available docks in real time.
3.2 Station actions
Initiate parking
Tap this button, to start a new parking session at the selected station.
Route planning
Tap this button to open the Maps application, which will automatically plan a route to the selected station.

4. Parking
In the following sections you can learn more about each step and feature of the parking process.

4.1 Map browsing
This is the initial option to find a station, marked with pins on the map. There are four different colours to indicate station status.
Green: Most of the docks are available.
Yellow: Only few docks are available.
Red: No available docks.
Grey: Out of service.
4.2 Search for station
Search field
If you want to find a station by its name, start a search here. The results will appear directly below the search field.
Station list
Here you can find the list of all stations, displayed from active to inactive.


4.3 Start parking
Initiate parking
Tap Initiate parking button to begin the parking process.
Confirm your selection
After initiation, you will be asked to confirm your selection. Tap Parking button to proceed.
Occupy your dock
Our system automatically assigns a dock for you. Tap the Got it! button to occupy the dock.
Place your ride
Complete the process by placing the ride within the 30 second time limit, then firmly close the gate!
Confirm success
After placing your ride you will be asked to confirm the success.
4.4 Parking in progress
Track your active parking session(s) by navigating to Parking → Parking in progress from the top-left menu. Here you can find the session information and perform multiple actions.
Session info
Find all the important information about your active parking session(s).
Stop parking
End your parking session by tapping the Stop parking button. (See 4.5)
Access camera feed
Take a look at your ride in real time by tapping the Camera button (See 4.6)


4.5 Stop parking
Stop parking
Tap Stop parking button to end the parking session.
Confirm your selection
After tapping the Stop parking button you will be asked to confirm your selection.
Remove your ride
Remove your ride
Complete the process by removing the ride, then please left the gate open.
Confirm the removal
After removing the ride, you will be asked to confirm the success.
4.6 Camera feed
Take a look at your ride by navigating to Parking → Parking in progress from the top-left menu.
Here you can see the station in real time and save it as an image.


4.7 Parking history
To track your parking history by navigating to Parking → Parking history from the menu at the top-left corner of the screen.
Here you will find the details of each parking session in a descending chronological order.
5. Reservation
(Coming soon)
–
6. Billing and payment
(coming soon)
–
Table of contents

